People are less surprised to find out I like wearing skirts occasionally but shocked…. SHOCKED to find out I have an arsenal of tools and know how to wield them. I have no idea why.
“So, I remodeled the kitchen, put in a glass tile back splash…”
“Wait, what? You? You know how to do that? You did that? You did?”
“Yeah and I did it wearing a cute skirt.”
“Right. So wait, you know how to tile a back splash?”
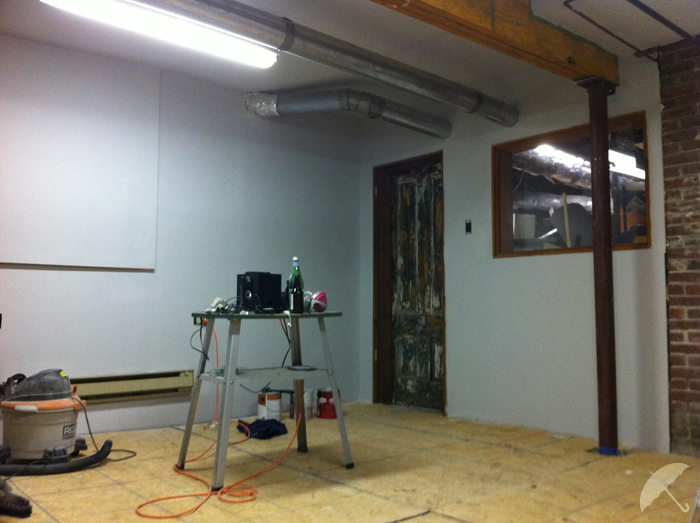
Anyway, there’s really not much to tell here. When I moved into my house last Spring the landlord gave me a tour of the basement. (You heard me, I don’t own this house.) Apparently over a decade ago some band had the same dream of building a studio in the basement of this magnificent 1890′s Victorian. They had framed out the room replete with two double paned studio booth windows.
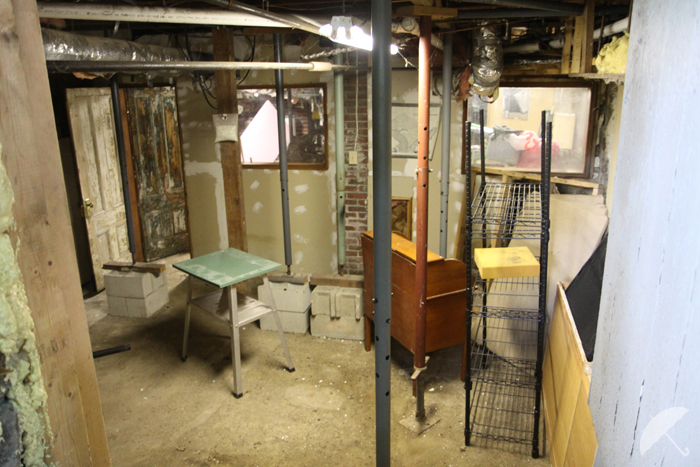
what the room looked like when the studio was a mere vision
While cleaning out all of the debris, leaves and miscellaneous cinder blocks, I found said band’s demo tape. If I had a cassette player I would post a sample. The band’s name on the tape? “Playland”. Someone suggested I name the studio after said band’s demo… “yeah, I’m not naming a room in the basement ‘Playland’.”
Sounds like I could move right in, right?
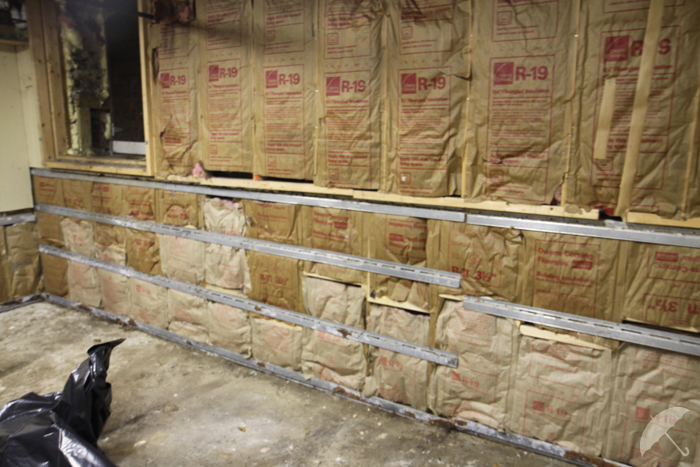
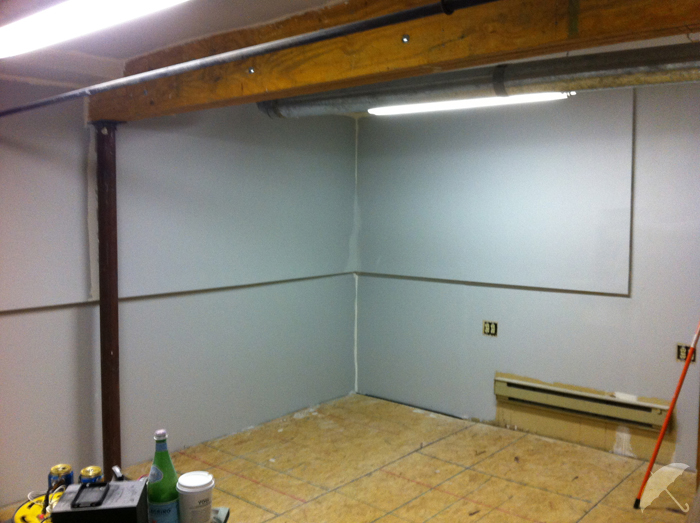
Well, the exposed ceiling was kind of a problem not to mention the black moldy insulation and drywall that had to be demoed. The floor was your classic combination of gravel, mortar and dirt. Aesthetically you could say the room had a classic basement sex-slave vibe.
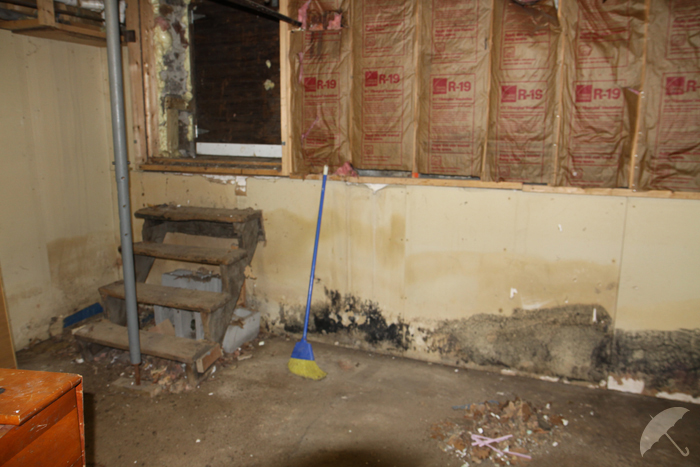
drywall and old insulation that needed to be demo’ed
The other major obstacle was the temporary jacks supporting the floor above, seven in total.
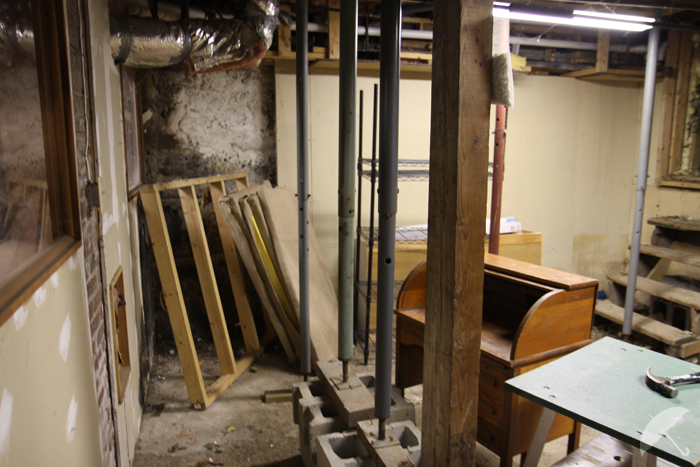
temporary basement jacks that needed to be replaced
My first order of business was really cleaning everything out of the room. And yes, I wore a mask. This alone took some time. The black mold was a little disconcerting… my guess is that at some point a pipe must have broke and there was neglected standing moisture. (I have been assured this is a very dry basement and I haven’t seen any moisture down there–knocking on wood.)
I made a 10% bleach solution and sprayed any trace of mold I came across. After that came the fun part of demoing most of the existing drywall. Additionally once I removed the boards I had to rip out the moldy insulation underneath. Good times!
I remember thinking, “This is going to take forever.”
old insulation replaced where needed and moldy drywall ripped out
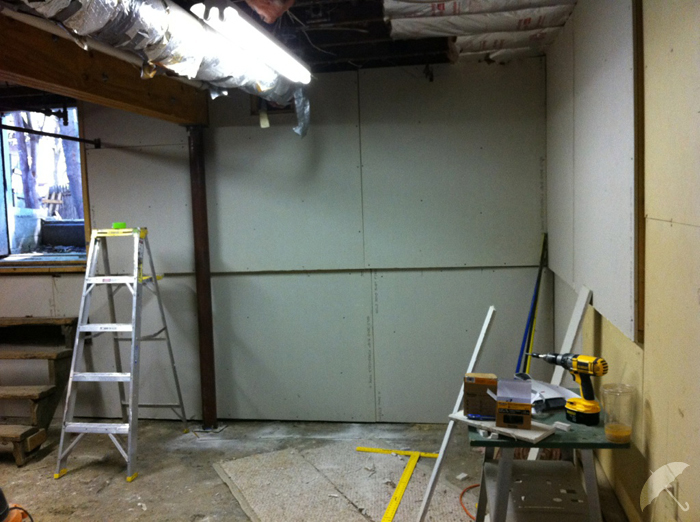
start of the drywalling, starting to feel like a room
The only thing I did not do to the room myself was replacing the temporary jacks. This required someone with knowledge of structural engineering. (I really didn’t want to be responsible for my bedroom crashing through to the studio.) The guy that installed the I-beam, (thus eliminating any poles in the middle of the room), did a great job. I asked him if he had any advice regarding drywalling the ceiling and he said, “you have a better chance of performing a piano concerto with the Symphony”.
Here I am installing the drywall on the ceiling, this was of course after insulating everything. I crazily hung about 60% of this by myself. (Gosh, how do I keep injuring myself?) Eventually I had to break down and beg for assistance from a few friends. I think they were both amazed at how awful, awful it is to hang drywall on a ceiling. But a good work-out.
to be able to hang this drywall mostly by myself I had to install in small sections, I also left most pipes accessible in case of an emergency.
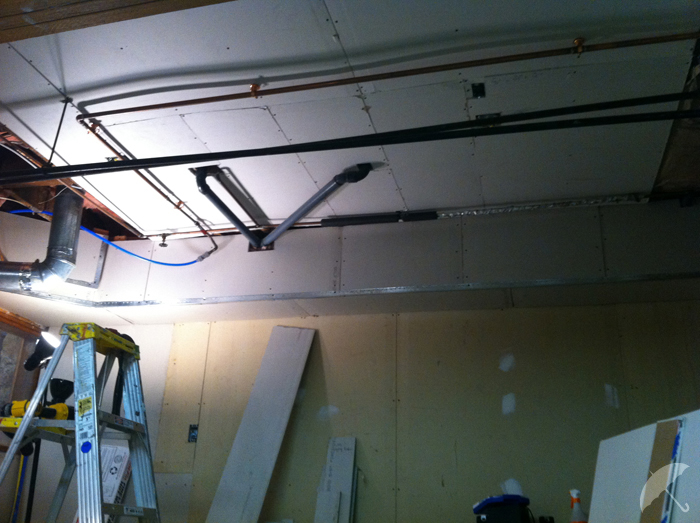
To keep costs down I tried to use reclaimed materials that I found around the basement. I chose to keep most of the water pipes exposed in case of a potential problem, i.e. not having to punch through a bunch of drywall to find a pin-hole. I did, however, box in all of the PVC drain pipes as they were just plain hideous.
finishing up all of the drywall, electric boxes in place for the lights
After completing hanging all of the drywall (took forever) I decided to tackle the floor. This was a four step process, the first of which was getting the floor somewhat level… unfortunately the existing gravel/mortar floor wouldn’t have been suitable for any flooring.
I used a self-leveling compound. This was also when it was very cold out so I had to mix this stuff in a 5-gallon bucket out of doors. The compound is very heavy especially when mixed with water… carrying buckets of the leveling down a flight of old rickety New England suicide stairs–not fun. It took three bags at $35 a pop. That’s three horrible trips down the stairs.
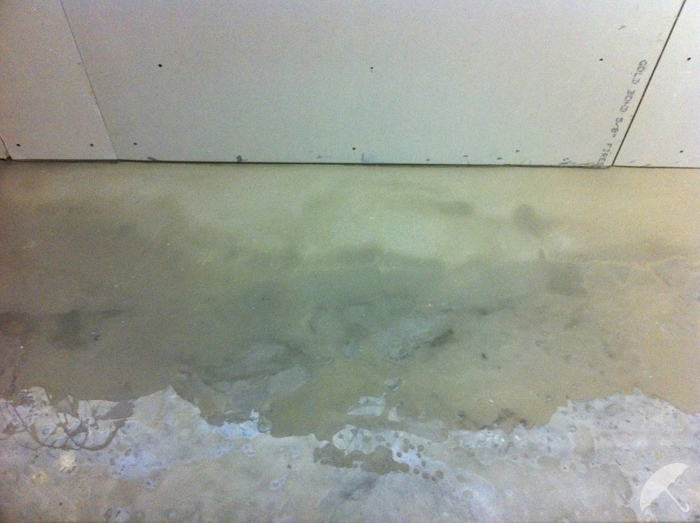
self-levelling compound poured over the existing gravel/cement/mortar
To keep any potential moisture from coming up through the cement I needed to create a vapor-lock. I initially was going to use dri-core but I did the math and it was just too expensive. I found Delta dimpled plastic sheeting from a company online and it worked perfectly. On top of the vapor lock came the plywood.
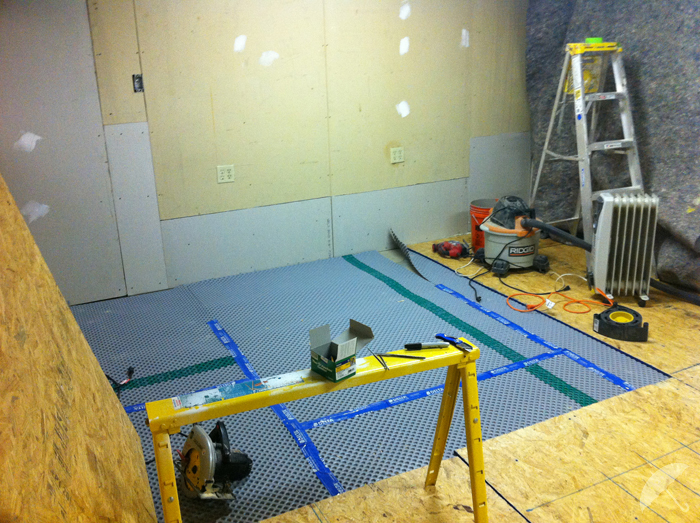
vapor lock material to keep moisture from coming up through the floor
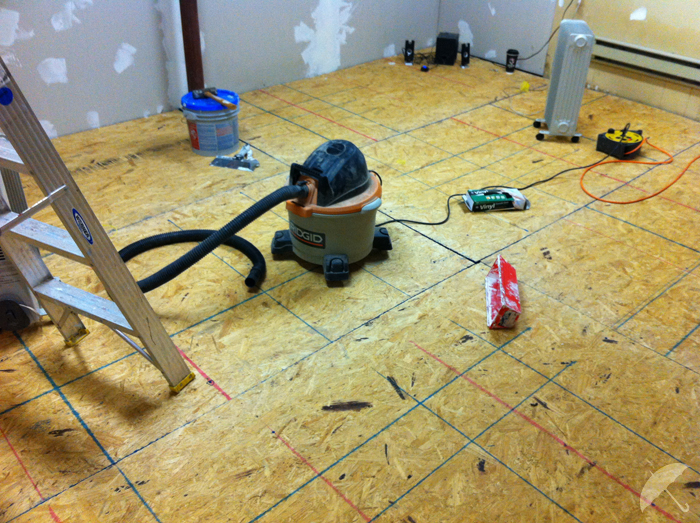
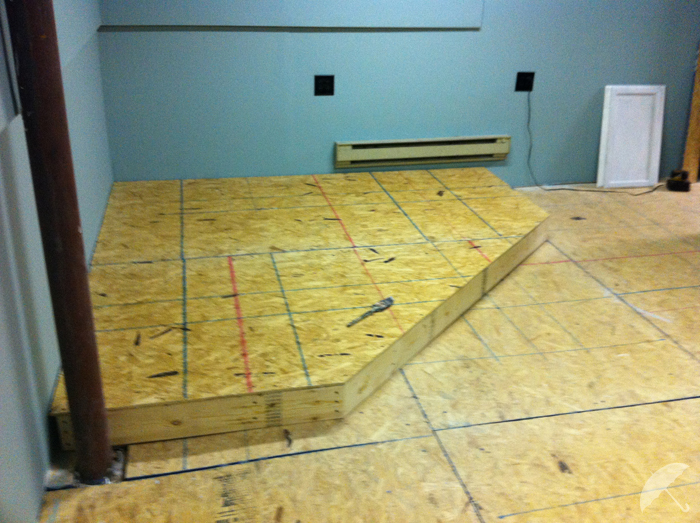
plywood over the vapor lock, now it’s really starting to look like a room
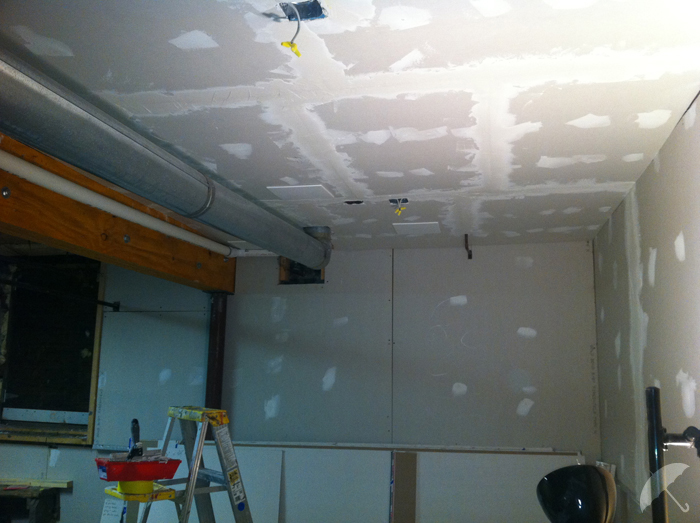
The next monumental task was really all of the plastering, patching around large holes where the ductwork meets with the walls. All of the ever-so-small details that just took hours and hours, days upon days. So much sanding.
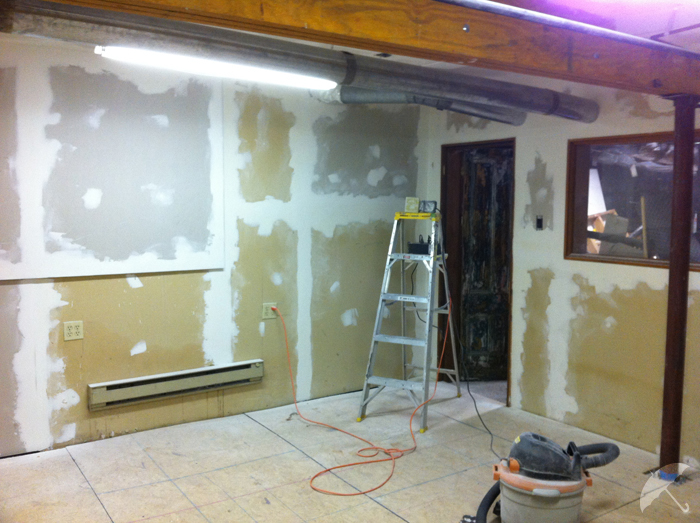
sanding drywall = not fun
Finally came the day when I could start painting. This was a glorious hour! I had to prime the room which afterward revealed some slight defects in my plastering/sanding. So there were a few places I had to go back. Someone adept at plastering probably could have done this project with 1 gallon of plaster. It took me 3 – 3-gallon buckets.
priming the walls
more priming
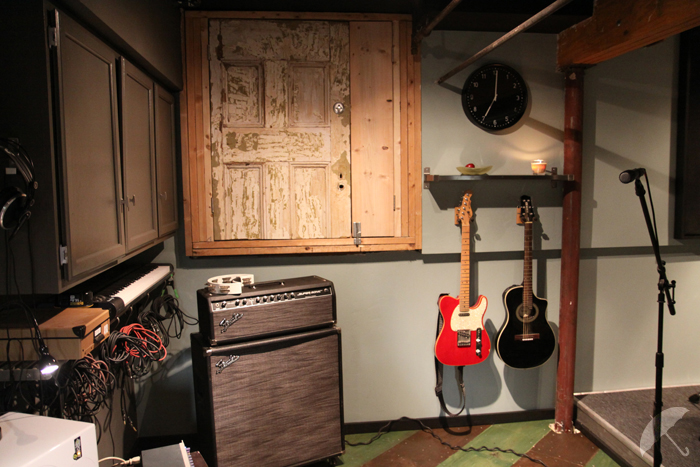
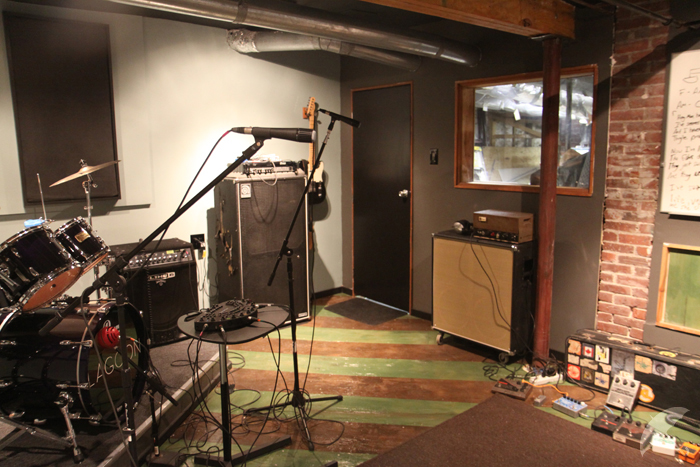
The colors for the room I chose were kind of a blue-green-gray (I call it ‘tornado sky’) and then a seal brown. The ceiling I painted flat black so it would ‘disappear’ and look studio-like. I forgot to mention this basement has unusual head room, about 9 feet.
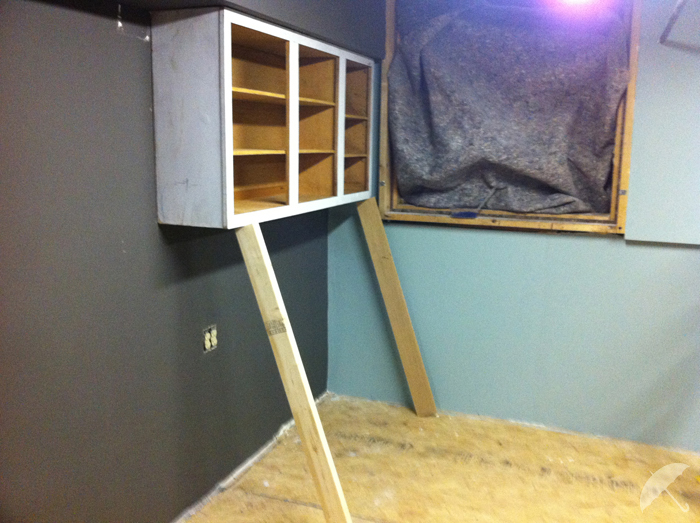
finishing the painting plus, this is how you hang a cupboard by yourself… genius!
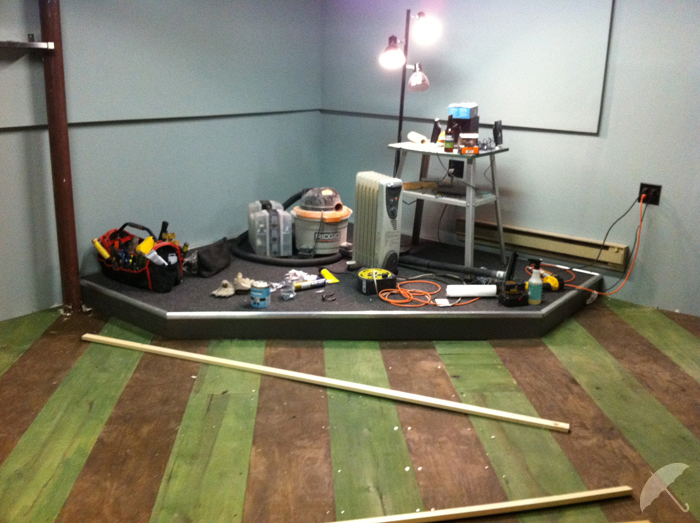
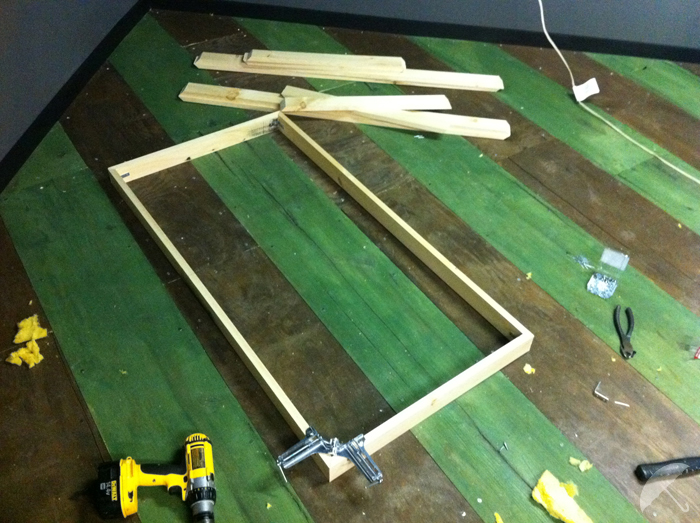
One of the surprise features I created for the room was a drum riser. I wanted the room to have some variance… it honestly took me only two hours to build–one of the few things that didn’t take an entire week to accomplish.
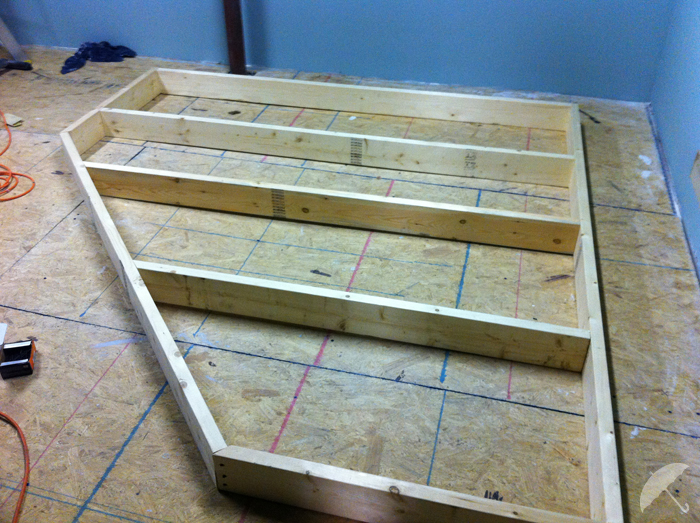
drum riser frame
I also ended up finishing it with carpet and metal edging, paint, etc.
drum riser coming together
So now the room is really coming together–there is a light at the end of the tunnel. But what to do with the floor? When I first started planning this project I thought I would use commercial VCT tile. Cheap, durable and you can special order it in crazy colors (such as hot pink). Then I started looking at composite faux-wood floors including IKEA’s products. I was really afraid that my gear would destroy anything remotely “faux” and real hard wood flooring was just way out of my budget. So then I had this idea that I would make my own plank wood flooring. I called up Home Depot and had them cut six sheets of sanded plywood into 12″ widths. I bought water-based stain and with the help of a friend we stained the planks (I went with a Jade green and a walnut brown).
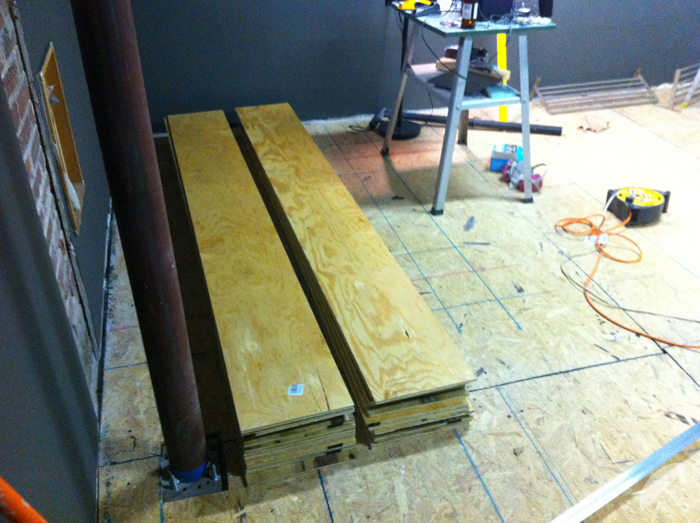
plywood soon to become cool new floor
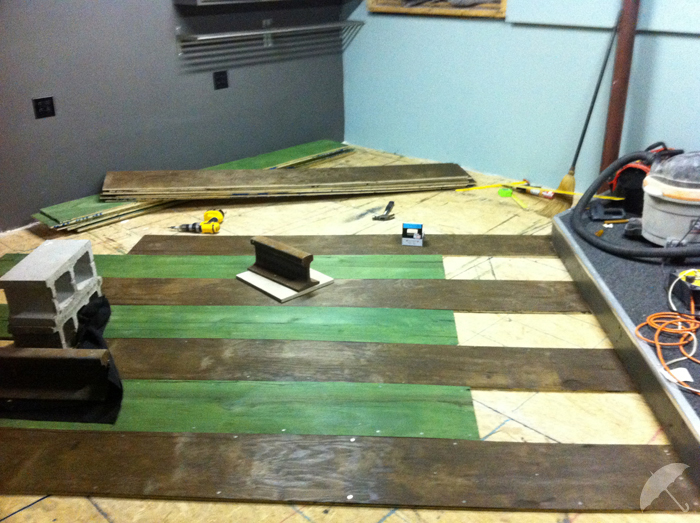
laying down the planks
This was working great until I realized that Home Depot didn’t measure the widths perfectly. Some boards were 11 7/8″ while others were 12 1/8″. But mostly, it worked out. I fastened the boards using liquid nails and old-fashioned penny nails.In some places I ended up needing to use a matching wood screw as the boards were, again, not perfect. Would I have done this in my living room? No. But for the studio I think it was an inexpensive solution that worked pretty well and looks unique. I should mention that the floor was treated with four coats of water-based gloss varnish which really brought out the detail of the wood.
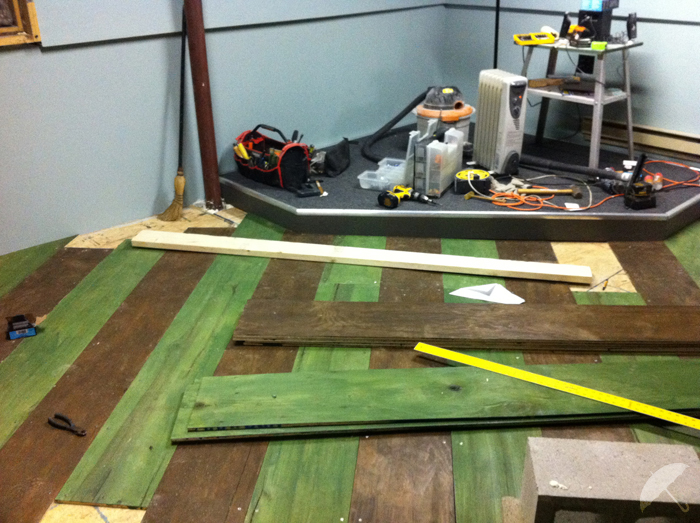
almost there…
I was amazed at how awesome things started looking after I took down the shop lights and installed the low-voltage halogens. I obsessed over the light fixtures. Originally I was going to have drop down pendants, but then I thought it would be too bright, and dimmer switches are bad for music gear (can create hum and noise artifacts). Ultimately I bought four $4 light fixtures from IKEA. You don’t even see them, they are mounted flush on the ceiling, they blend in with the black paint and they provide the exact right amount of light–not exactly dim, but a very mellow yet slightly dramatic touch.
holy shit this is looking cool!
A lot of remaining details had yet to be done… I built frames for sound absorbing material, had to create a solution for the load-in bulk head door and install a solid core door and locks for security.Oh, and base boards around the perimeter of the room and drum riser. (Not to mention painting all of that stuff.)
sound absorbing frames
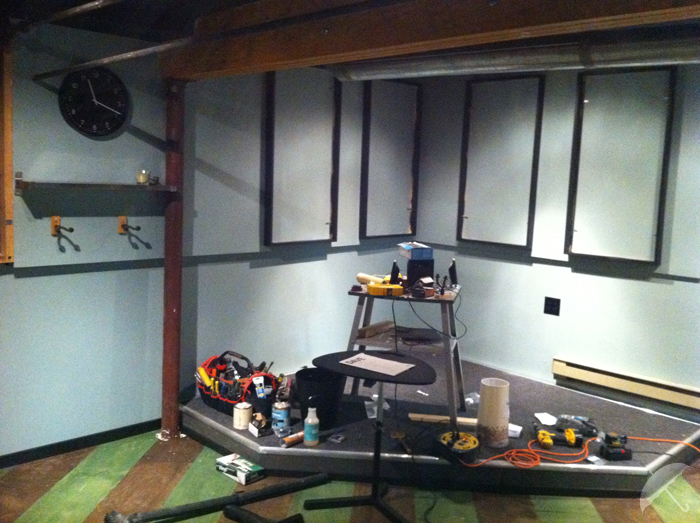
frames hung up on the wall, shop lights down and new light fixtures up
In the end there really isn’t anything I would have changed. I think it turned out really well and I added a few new things onto my handy-man belt. Got a few new tools…
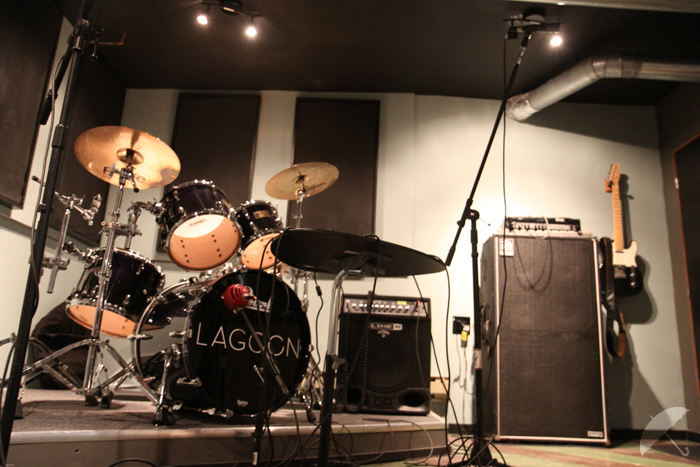

Indeed… I got a few new tools.
So now what? Well I have been working on some new projects… check out my music category from the menu above to hear what I’ve been up to! Thanks for reading.
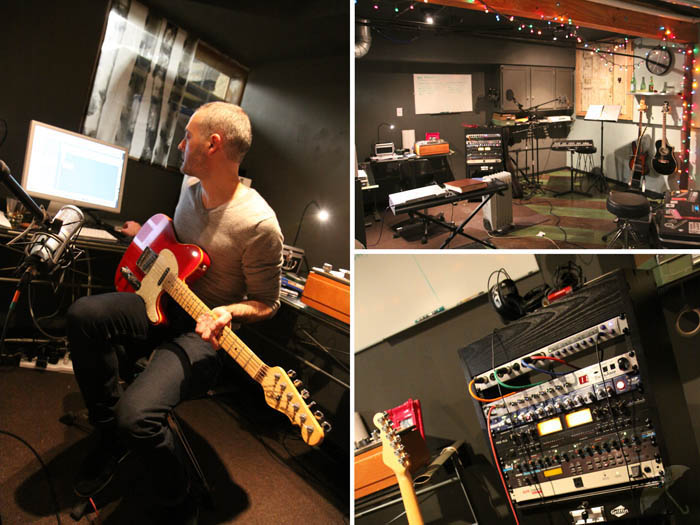
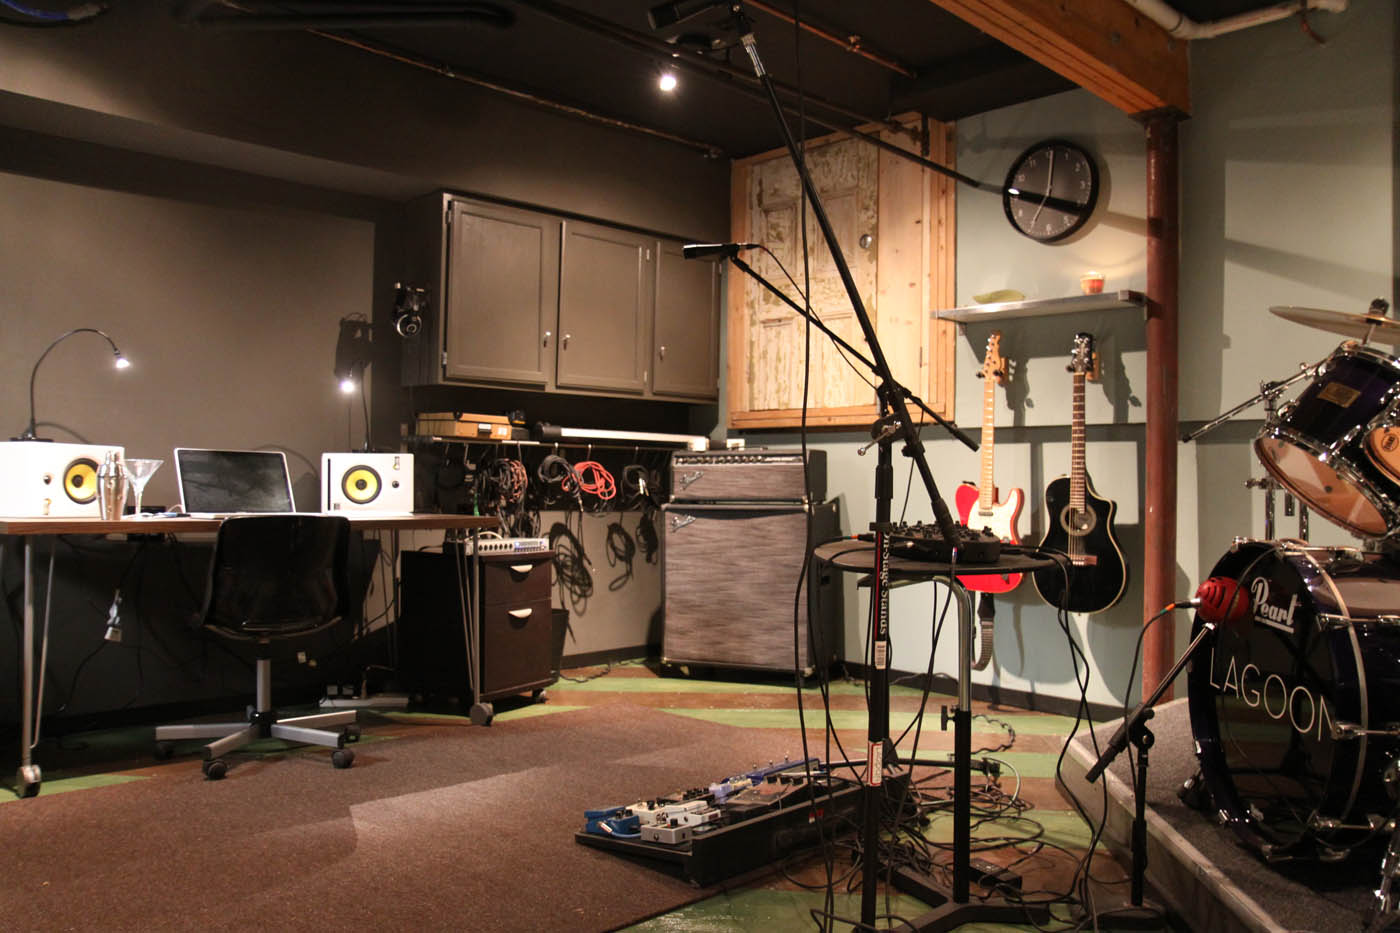
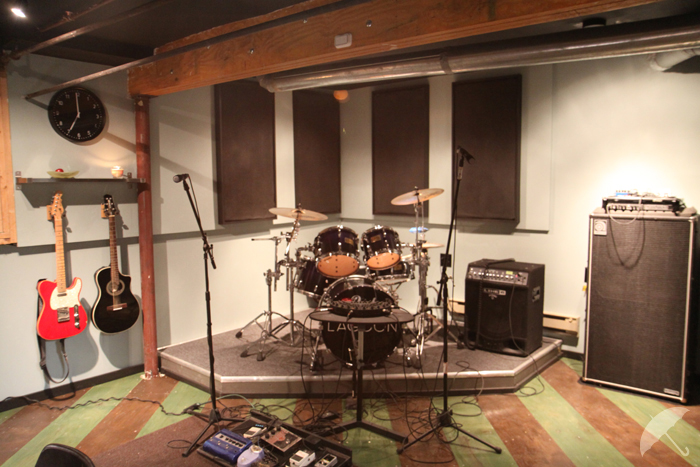
working in the studio in 2013!


4 Comments
I am still amazed. Incredibly well done. Kudos, dude.
Oh yeah……and I liked the martini glass and shaker……………nice finishing touch.
Hey David!
Great room and wonderful documentation! Really inspiring stuff.
I’ll have to show you the red hollow body, single PU, F-hole Tele I built at Stars Guitars in SF in ’79.
Wow. Just wow. Thanks for sharing.