A couple of weekends ago I decided I could no longer take our bleak Soviet-era Eastern-European bathroom. I gave myself a modest budget of $200 and made a list of things I wanted to accomplish.
Most obvious was probably the existing paint… the trim definitely needed a fresh coat not to mention the depressing, dingy white walls. The medicine cabinet door had recently fallen off, due to its particle board construction, so this definitely needed to be replaced. And then the 1980’s backstage-community-theatre vanity light with the four round bulbs… ick. Most of the sundries were fairly useless, clinging to the walls for dear life, so I decided these needed updating as well.

I needed to make the most of my $200 so I decided that a trip to IKEA was in order.
IKEA does some things well, but a great deal of other things less well. What not to buy at IKEA: furniture, pots/pans, mattresses and anything made with particle board construction (which is 80% of IKEA). Oh, and I recommend avoiding the weird IKEA food (that might also contain particle board). What I have had good luck with from IKEA: textiles, light fixtures, picture frames, mirrors, anything made out of solid wood, glass or metal.
PRO TIP: shopping at IKEA is a mother fucking nightmare. Prior to visiting IKEA, peruse their website and know what you want ahead of time; otherwise, you’re walking out of there with a bunch of shit you don’t need (that takes six hours to build and will last equally as long before it ends up in a landfill–or the FREE section of Craigslist). Also, don’t get herded through the showroom. Enter through the pick-up area past the registers. Trust me–this will save you about two hours that you can use for other things later in life.
My first step was getting everything out of the bathroom. The less clutter in the way the better. I also gave the room a quick once-over–vacuumed, wiped down the walls, etc. Next step: removing the old sundries, medicine cabinet and light fixture.
I’ve tackled enough of these projects to know there will always be minor set-backs. Always. I encountered my first challenge fairly quickly… I discovered the medicine cabinet wasn’t mounted flush to the wall. It had actually been inset into the drywall now leaving me with a hole. No big deal, I had some leftover drywall from a previous project. (Always good to have on hand anyway.) I had to do some trickery to get the drywall flush with the rest of the wall, but this didn’t take too long.

And then challenge #2: After taking down the vanity light I discovered that the wiring had simply been punched through the wall (and was off-center). Perhaps a blessing in disguise. Naturally, I discovered this after I had already installed the new piece of drywall, so I had to remove it to reroute the wiring. Maybe it’s a symptom of doing a lot of these projects, but I also happened to have a spare electrical box on hand.

Once I had everything off the walls, and the new drywall and electric box in place, my next step was plastering. Which I suck at. You would think being artistically and mechanically inclined I could tackle something like plastering with ease, but I truly do not have a knack for it. In the future I should forgo the plaster knives and just use my hands.
Next, I started the painting. Even though I was painting the trim white over existing white, it still took two solid coats. I wanted to brighten up the walls with a bit of color but I had to select something that would work with the existing tile (forest green–ugh). Gray seemed like an obvious choice except for that my entire place is already shrouded in varying shades of overcast. I initially picked a violet color but after a test-patch surmised that it was way too Easter egg. I’ve never done this before, but I had some left-over gray paint in the basement and decided to play Mr. paint-chemist. I am happy to say that I ended up with exactly what I had originally envisioned by mixing the two colors together. The end-result is a muted smokey lilac–just enough pigment for the color to not read gray. I need my own paint company.
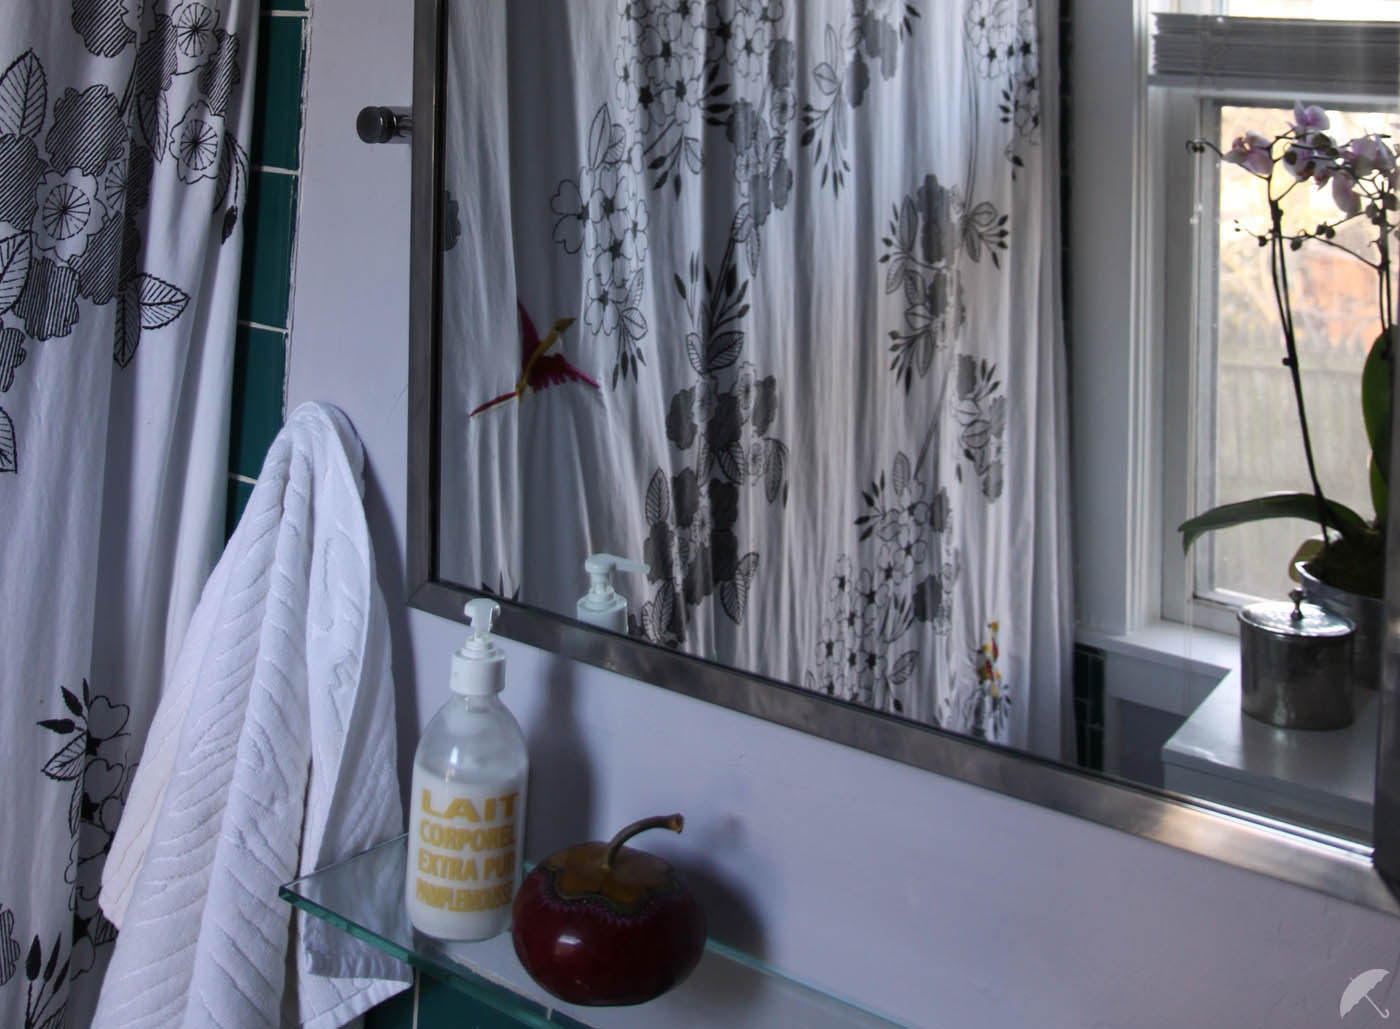
After the paint dried I installed the new light fixture, the new mirror, a few glass shelves and all of the sundries. The project took a weekend–which included a trip to IKEA and Home Depot and came in at just under $200. The difference? Amazing. So much better–the space now feels finished, cleaner and brighter.

Most importantly, I can now allow my guests to use the restroom without having to see their papers.
If you have any questions feel free to leave them in the comments section below! Thanks for reading!


3 Comments
So, that’s just a mirror…not a medicine cabinet? Love your color selection and no matter what I work on, I always like doing the “before-after” photos for comparison. Great job…once again, dude.
Come to my house next please. I could use a spa bathroom make-over. I peruse Houzz.com for ideas for color, placement. I agree, empty the room first, see what you have to work with.
another thought, will you post some beautiful yet, budget-stretcher friendly meals to your food blog? Pretty please?
Done! I hope you like whiskey soup! Kidding, but seriously I will be posting some budget food stuffs just for you!